
In the first part of this permeable pavement construction, we discussed excavation, scarification, adding a geotextile and clean stone. Now, part 2 will cover the addition of a geogrid, laying pavers, lifting tools, edge restraint and joint fill.
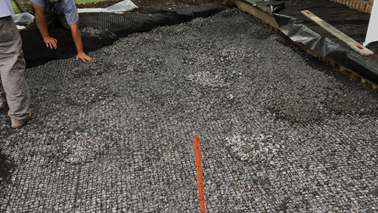
Intermittent layer of grid
Compaction has been our mantra in the hardscape industry.
However, using open graded stone does not require compaction.
It’s a 3/4-inch clean angular symmetrical material, commonly called ASTM # 57.
In a environment with a deep frost line and a lot of freeze thaw cycles, the typical base would have been 9 inches.
By adding a geogrid, we were able to save money for the consumers and get in and out of this job quicker with a 6-inch base.
We incorporated a biaxial geogrid, an Alliance Gator Grid GG 30-30.
When installing these biaxial grids, be careful not to have any overlap, only abutting with 100% coverage.
Pavers, edging and joint fill
STEP 1: Add a 1-inch bedding layer of #8 stone. Screed it. No compaction is needed.
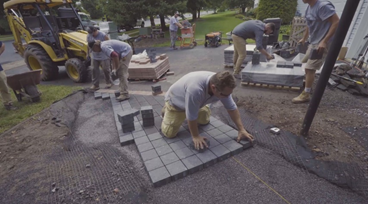
STEP 2: Lay the pavers.
Carrying pavers by hand can be troublesome.
If your upper body weight is 105 lbs, bending over to pick up a stack of pavers (10 lbs) applies 1,150 lbs of pressure on your lower back!
Using lifting tools can save you time and effort, while preventing injuries.
The tool we used permitted us to carry 10 pavers at a time with a laying face. It was quick and efficient.

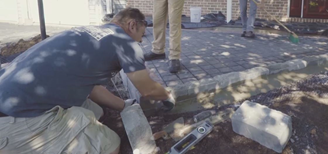
STEP 3: Add a border.
We used our Red and black Victorien pavers in an interlocking application as the border on header course around the project.
We chose this border because of the windblown debris from the leaves of the shedding trees.
They build up against the edge, and it’s easy to shovel and remove them without contaminating the joints on the permeable pavement system.
STEP 4: Install an elevated edge. Set it on the base with a slight mortared bed and then backfill with steel-reinforced concrete for integrity.
We chose our Avignon as an elevated edge and made sure to follow the erosion and sediment control measures.
An elevated edge helps to keep all the mulch and debris away from the pavement.
We incorporated a Durawall type of product. As opposed to rebar, it is very easy to bend.
We kept plenty of overlap on it. That steel gives the system enough strength for this type of environment.
Once the unit is bent, it’s ready to be backfilled with concrete.
STEP 5: Sweep #9 stone into the joints until they are just below the chamfer.
We chose Gator Aqua Rock from Alliance. It’s a #9 material, which means a symmetrical particle less than 5% passing the 200 sieve, and it’s hardness-tested.
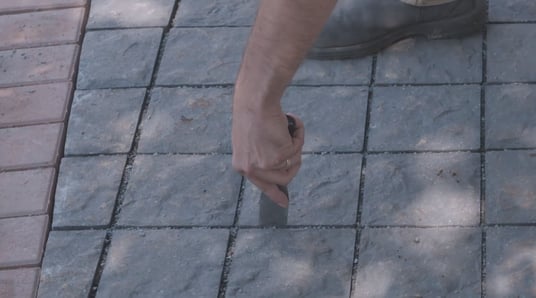
Make sure it’s completely consolidated by performing a putty knife test.
If you can get more than a 1/2-inch penetration with the putty knife, additional sweeping and consolidation should be done.
Remember:
- Scarification of subgrade increases infiltration
- The minimum geotextile requirements for this application is an apparent opening size of 70-100 and a weight of 4 oz.
- Biaxial grid stabilizes and reduces base thickness
For additional help, you can also refer to this cross section of a permeable pavement construction:
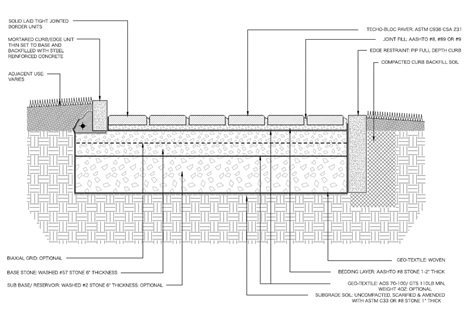
VIEW OUR SELECTION OF PERMEABLE PAVEMENT AND BENEFIT FROM CROSS-SECTION EXPLANATIONS TODAY!

Leave A Comment