Follow these steps to create a drainage swale behind your next segmental retaining wall.

Creating a drainage swale at the top of the wall
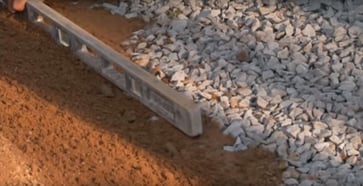
STEP 1:
Taper a 3-foot column of clean stone (ASTM C 2940) away from the wall. If applicable, do the same with any backfill that would extend beyond the clean stone.
Verify that there is a positive gravity flow of water and that it has a correct pitch.
STEP 2:
Wrap the area in geotextile fabric. Allow for an 8-inch overlap between pieces. Tuck it up against the back of the wall.
STEP 3:
Grab another piece of geotextile fabric and tuck it under to allow water to circulate over the top. Always shingle pieces of geotextile with the flow of water.
Once the low permeability clay fill is installed, water permeating from the surface will be directed away from the wall system, out into the environment.
In this case, we measured about 9 inches down from the top of the wall. We will put 8 inches of low permeability clay fill and an inch of top soil closest to the wall. The depth of the topsoil will increase as we near the low point of the swale.
Low permeability cap layer
STEP 4:
Add the low-permeability clay fill behind the wall.
It is dense and provides a very low permeability, perfect for a cap layer. It will prevent water from spreading in and behind the wall.
Compaction of low permeability cap layer
The clay fill might appear granular and friable, but it is very cohesive and easily holds together.
STEP 5:
Compact the low permeability cap layer.
We recommend a light compactor and it should be a non-reversible unit, because the plate tends to stick to the clay soil.
To keep the compactor moving, it’s also a good idea to have somebody spread a thin layer of sand down.
Summary of grade at top of wall
To summarize, we installed:
- 3-foot column of clean stone, pitched away from the wall face
- Geotextile fabric, shingled away from the wall face
- 8-inch layer of low permeability clay fill, pitched away from the wall face and compacted
The water will follow the pitch of the swale and run off. It won’t spread into the layers of backfill.
LAST STEP: Add about 20 to 21 inches of topsoil for root growth. Plantings should be concentrated in the deepest part of the swale area to avoid compromising the low-permeability cap.
JOIN THOUSANDS OF HARDSCAPERS THIS WINTER AT CONTRACTOR SHOWCASE AND TOGETHER, LET'S BUILD YOUR BUSINESS!