

Paver Pete explains how to install a drain tile behind a segmental retaining wall to properly drain water away from the base.
Positive gravity flow through the drain tile
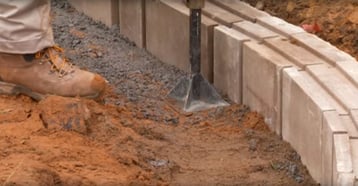
STEP 1: Compact the soil and build the base course of blocks for the wall.
STEP 2: The water circulating into the back cut and the compaction zone needs to enter a pipe with an appropriate pitch to allow proper drainage. The pipe needs to be set at the right height across the entire length of the wall. In this case, we need to add a crusher run material (ASTM C2940) behind the wall and compact it. The crusher run is used to build up an impermeable backfill layer to establish the correct elevation for the pipe to be able to capture the water and direct it out of the SRW system.
We have about 6 inches of pitch over 50 feet. The national concrete and masonry association (NCMA) requires that the pipe for drainage behind the wall should be exposed to daylight at least every 50 feet. The perforated pipe should have a 4” diameter.
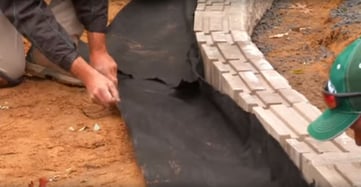
Soil separation
STEP 3: Install a geotextile fabric behind the wall and bring it up the back of the block. Keep an overlap of 2 feet. We separate the soils to avoid migration of the compacted base material into our clean stone.
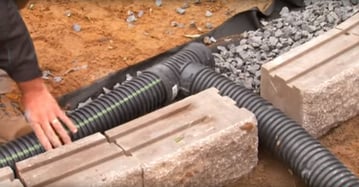
Clean stone
STEP 4: Add 4 inches of clean #57 stone over the geotextile. As water travels through the back cut and the soil reinforced zone, it will carry sediments. We want these sediments to bypass the pipe and flow through the clean stone. Sediments will settle at the bottom of the zone and clean water will enter the pipe, prolonging its useable life.

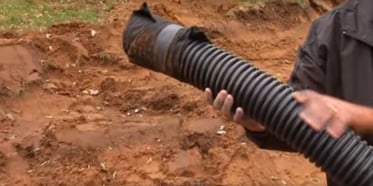
Day Lighting
STEP 5: Wrap the end of the perforated pipe in a geotextile fabric to avoid clogging. Avoid wrapping the entire pipe in this fabric because it has the propensity to clog faster than the surrounding layer of clean stone.
STEP 6: Plumb the pipe to a T-box for each daylight section, or exit, of the drain tile. Ensure that the pipe releases the water out into the environment, but away from the toe of the wall.
STEP 7: Establish erosion and sediment control measures outside of the wall, where the pipe releases the water, to prevent damages to the wall system. Compacted low-permeability clay fill, a pond liner are good options to use here to prevent the water from washing away the soil or base material of the wall system.
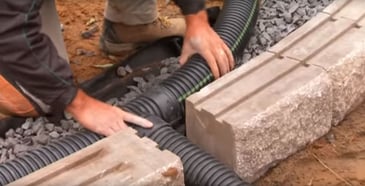
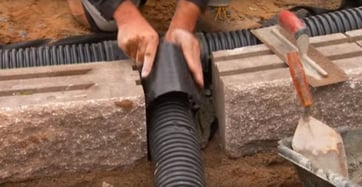
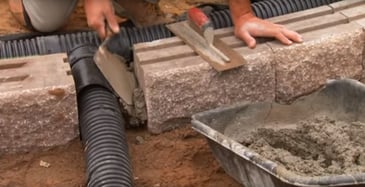
Mortaring the T-box
STEP 8: Protect the pipe with a fabric.
STEP 9: Fill the rest of the opening with a concrete mix to keep the wall block in place and to prevent migration of the clean stone backfill, even if it’s below grade.
The next unit above will bridge the opening.
GAIN ACCESS TO TOOLS AND INFORMATION THAT WILL HELP YOUR BUSINESS STANDOUT TODAY!
