
Second part on how to construct Mini-Creta fire pits. We discuss how to install a burner and its components with Mike from Firegear.
In part 1, we discussed how to prepare a site for a fire pit construction. Here are the steps to follow to install a burner and its components.
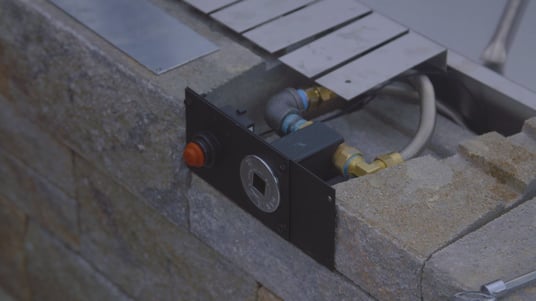
STEP 1: Install an installation system for the valve. The system we chose is called a paver valve control kit.
It’s a key system with an optional manual spark igniter kit (MSI).
The MSI kit runs a lead to the igniter. You just have to turn on the valve to spark and light the fire, as opposed to a key system that is typically match-lit.
Add tapcon screws and apply adhesive to hold the bracket in place.
Click here for more information on how to install a match-lit liquid propane burner for a fire pit.
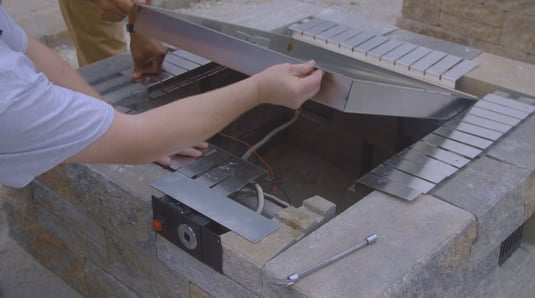
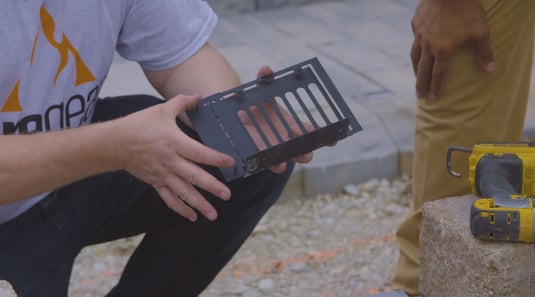
STEP 2: Mount a lintel over the valve. This piece of metal will hold the weight of the caps that will be placed above it, if a break or gap in the stones occurs.

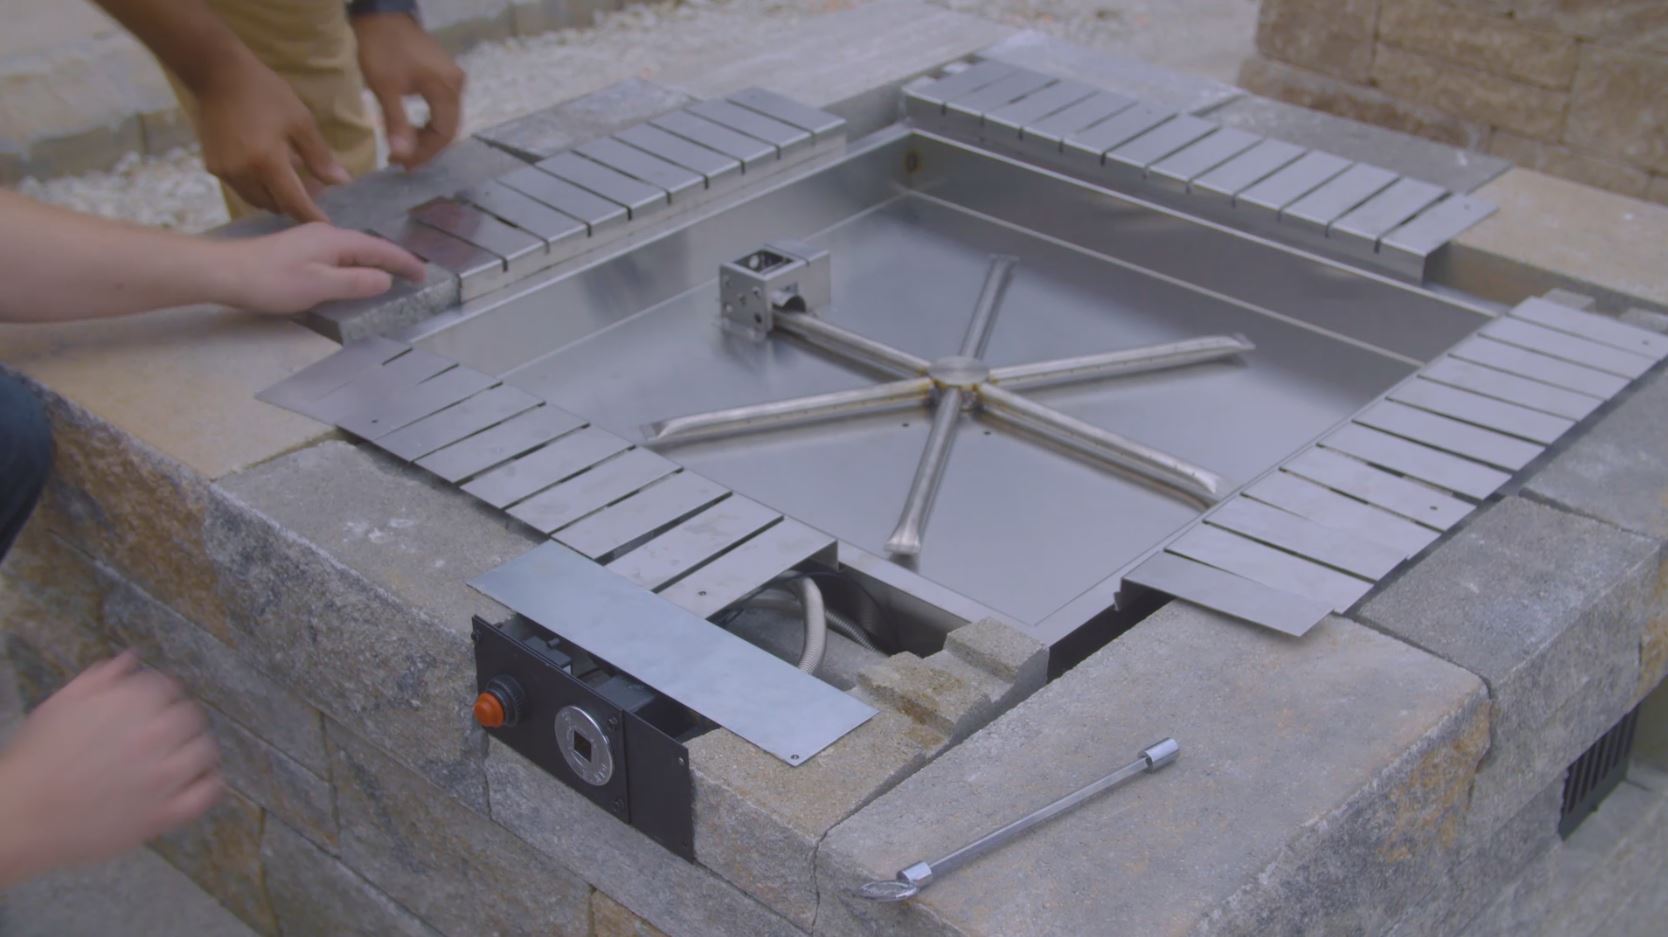
STEP 3: Incorporate a Flexframe system. It can be easily adjusted depending on the size of the opening, and removing the burner for any service work becomes a piece of cake.
STEP 4: Install a ventilation system for the gas.
You have 2 options for this step.
Option 1: Get a Paver Vent Kit from Firegear. The vents measure 6 inches.
Install 2 of them right in the openings to create cross-ventilation. It is required to have 18 square inches of cross-ventilation. 6 inches is more than enough, but the vents are designed with additional gaps around them to provide additional air flow.
Drill holes for the screws and glue it with construction adhesive to keep it in place.
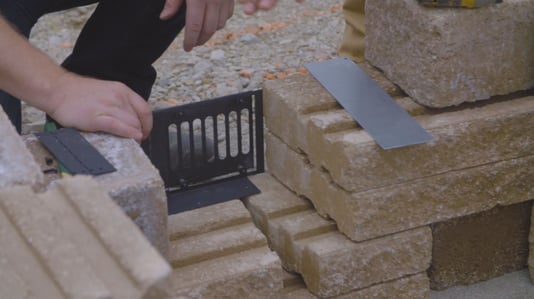
The vent is equipped with a panel that adjusts itself depending on the size of the opening, so there’s no need for cuts.
Add another lintel to bridge the gap. It’s thin enough so no shimming and no grinding is needed, and it will again hold the weight of the stones above it if anything breaks.
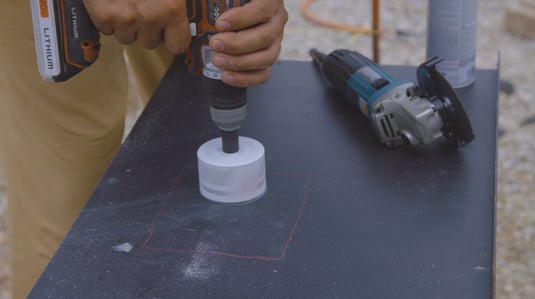
Option 2: Buy an insert available from Techo-Bloc (packaged separately).
Operate a hole saw or a grinding wheel to drill a hole on the side of the insert to give the system proper ventilation.
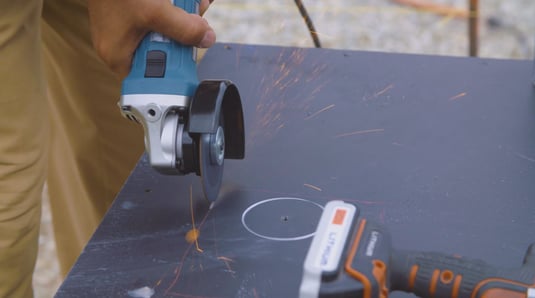
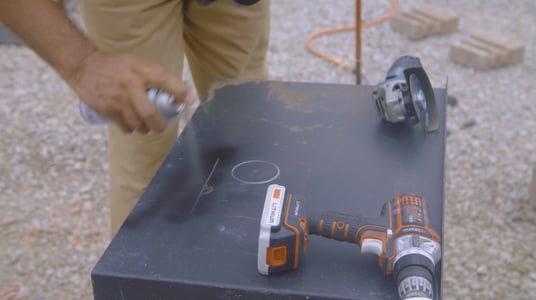
Be sure to paint the sides of the hole once it is done so it doesn’t rust.
To learn more about the Firegear products we used for this application, click here to visit their website.
Keep in mind that working with natural gas or liquid propane is extremely hazardous. This article is intended for informational purposes only. It's recommended that you hire a qualified contractor to install gas supply lines and appliances. Local codes should always be followed, as well as the manufacturer's installation operation and safety instructions.
GAIN ACCESS TO TOOLS AND INFORMATION THAT WILL MAKE YOUR BUSINESS STAND OUT TODAY!
