In the last 20 years, 200,000 pools were built in North America. How does that number affect you as a contractor? Even though you might not be building pools, you might be interested in the pool coping and pavers that need remodeling throughout the years. In 2019, 35% of the pool market was focused on the purchase of new pool products and 65% on pool renovation products. For every dollar invested in pool products, we can potentially make 65 cents by focusing on pool renovations.
Consider the lifecycle of the different materials used in pool construction:
- Liners - 10 to 15 years
- Waterline Tile and Coping - 15 to 20 years
- Concrete and Gunite - 25 years
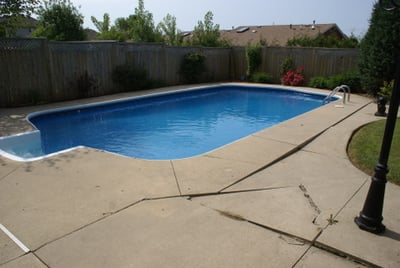
Over time, concrete can move, crack and then lose their aesthetic appeal.

Renovate this cracked poolside with Pacific Slabs and Coping
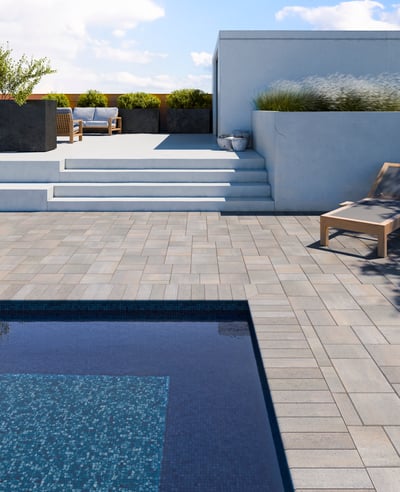
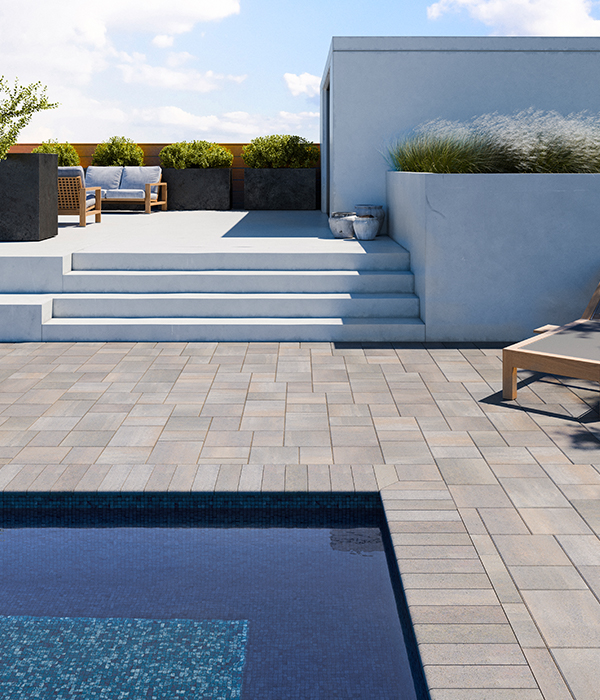
Our Pacific Collection is the perfect solution for cracked, damaged concrete poolside. This overlay system makes your client's poolside look modern and as good as new!

A game changer for pool renovation: the Pacific collection by Techo-Bloc
Our Pacific collection is a line of products that Techo-Bloc created specifically to help you renovate one - or many - of the 200,000 pools that were built in the last 20 years. With 1 3/16-inch-thick coping and a 3-piece slab system, you have everything you need to quickly assemble beautiful new coping and slabs for your pool renovation jobs.
Pacific coping is compact in size and has a full bullnose edge. This product has no spacer bars and is freeze and thaw resistant. It’s quick to lay and has a beautiful smooth texture.
How to install our Pacific Collection for pool renovations
Here’s how to proceed when you have a client with an existing pool that needs to be renovated. You can also watch the video down below to watch our Pacific installation demo:
Step 1: Overlay or Remove the existing pool coping
Simply prepare the existing coping for overlay by grinding out imperfections or chiseling out the old coping. This ensures you’ll have a clean surface on which to install your brand-new Pacific coping. The surface might be rough or may even be cracked. If the old coping is damaged, remove it. Overlays are never a band-aid for bad concrete. Surface tolerance must be within +/- 3/8’’ over a 10’ span for the units to be installed with concrete adhesive. This can be checked with a long straightedge. Any more imperfection than that and the units will have to be mortared in.
Step 2: Prep your setting bed (if you removed coping)
Use a type S mortar mix to replace the old coping if you have removed it. Also use mason cords or cotton sash into the mortar bed to wick away the moisture from the area behind the coping. This will ensure no excessive moisture against the mortar bed. Having those mason cords or cotton sash in the setting bed is important as the type S mortar has an absorption rate of 15% and the Techo-Bloc coping around 3%. This means that the mortar and the coping do not freeze and thaw at the same rate. When you add the coping, it’s important to do it with a slight pitch back to help those mason cords wick away the moisture so the bedding won’t expand, contract and potentially crack or separate.
Step 3: Install your corner
Install your coping in a corner to start.
Step 4: Dip the Pacific Coping units into water (if you removed the coping)
Dip your units into water before installing them into the mortar bed. We recommend doing this because putting the dry units directly into the mortar will remove the moisture from the mortar, which would decrease the adhesion.
Step 5: Apply the Pacific Coping on your setting bed (if you removed the coping)
Start from the corner you have already installed and work out your next pieces so they align. After you have installed a row, make sure it is level. If it is not, make the necessary adjustments.
Step 6: Apply the Pacific Coping on your concrete (if you didn’t remove the coping)
To apply our Pacific coping on a concrete area, we want to glue them down using a polyurethane type adhesive. For the adhesive method, we do not want to wet the Pacific pavers - we want to keep them dry to have a better bond between the concrete and the coping. This will allow the adhesive to expand into the pores of the coping and concrete
Always run adhesive parallel to the length of the coping in an “S” shape. This will maximize the length of the bead and promote better adhesion to the concrete. Lay one paver next to the other so they align. Check for consistent overhang using a long straightedge, square or string line.
Step 7: Apply geotextile fabric on top of the area where you want to put your slabs down
There are two types of concrete that we are going to encounter: cracked or going to crack. To create a separation between the concrete and the new pavers, put down a woven or non-woven geotextile fabric over the concrete area and extend along the back of the coping. This allows confinement of the sand when a crack develops.
If you have mortared the coping down, you want to use one inch of concrete sand. If you have used adhesive to secure the coping, you will want to opt for a skim coat of masonry sand because it is a little finer and has round particles. You’ll be able to overlay the concrete after that.
Step 8: Apply the Pacific Slabs
Lay your 3-piece slab set into either a herringbone or a running bond pattern.
Step 9: Protect your Pacific Slabs and coping
Unlike a lot of systems on the market, Pacific slabs don’t have a spacer bar to allow for sand filled joints. We recommend doing a post-construction wash and apply a protectant to your Pacific slabs and coping to promote runoff and get that water out of there. This will also subdue organics, moss and mold.
Do not miss the opportunities that the pool renovation market has to offer. Use our Pacific collection to help you create a beautiful, brand new pool look that will please your customers.


